CLICK HERE FOR FREE BLOG LAYOUTS, LINK BUTTONS AND MORE! »
Showing posts with label accessorize. Show all posts

Monday, October 8, 2012

Bewitching

Last year I made myself a Halloween headband for the holiday, you know since I was pregnant and not dressing up. I love to dress up for Halloween but haven't done it in years. I wasn't planning on making another headband this year until a nice trip to Jo-Ann's last week. And by nice I mean a leisurely, calm, quiet, walk up and down every aisle if I wanted to by MYSELF kind of nice trip.

The handy husband said he would run to the Wal-Mart across the parking lot with the kidlets and get the milk and coffee we had run out of. Who needs romantic movies? Chivalry at its finest.

It was like being on vacation! :)

While perusing all the craft supplies I could ever need (and quite a few I never will, but still I looked because, hey, I had no time limit!) I came across this little cutie.

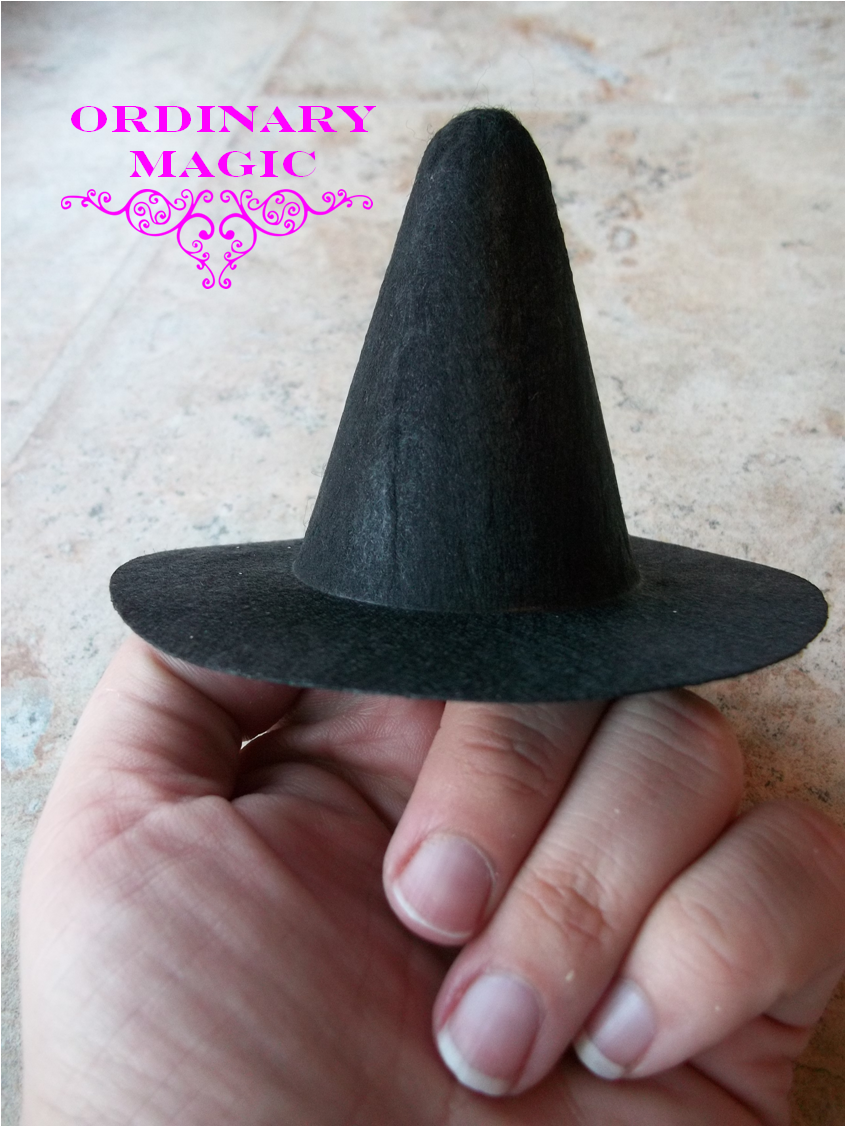
I am pretty sure it's for a doll. I think it was $1.99 or something and since I had one of those 20% off your total purchase coupons I bought it. And, to show you just how tiny and cute this thing is...
it fits on my finger!

I went through my stash of supplies and embellished it a little. I used the same black netting stuff from last year and added some orange ribbon and I made a little fabric flower out of some orange and black polk a dot fabric from yet another past project. I found this black, sparkly headband in the value bins at Jo-Ann's-the ones where you stand in line for the next available cashier-for $1! Perfect!

 
(I hate being in my own pictures but it was naptime for everyone else in the house:) )
 
I think it's cute but I may try making another one. This one is for a cute, silly witch I think. I am thinking one for a chic witch, a classy witch...maybe lace, feathers, glitter or sparklies of some kind? How would you decorate a witch hat?

And, because someone woke up from his nap in the middle of this, how cute is this little goblin??
 
I'll be saving this to put on display when he graduates high school :)

Monday, August 13, 2012

Ribbon Organization

A few months back my husband and I took some time to organize each of our 'work rooms'. They are both in the basement and are both a mess most of the time. We do a organization day every few months. My room is a 'craft room' that also stores much of my holiday decor and baby/kid items and clothes. My room is also not as much of a disaster as his!

On this particular day I asked for his advice on how I could store my ribbons better. I have too many spools of ribbon. I use them mostly to make hair bows but I find other uses for them from time to time too. But, my collection had outgrown my original storage for them and they were everywhere and always unwinding. My wonderful husband came to the rescue and came up with an idea to utilize some empty wall space and some leftover peg board he had laying around. I am such a lucky lady! After taking this picture, he and my mom both asked me not to buy any more ribbon for a while ;)


Ribbon,ribbon,ribbon...So pretty!


 In the back there is a wire strung holding all of my holiday ribbons....

In front of that is a tiny dowel for all of my tiny ribbon spools...


You can get those metal rods to stick in the peg board like they have in stores...did you know that? I don't remember where he found them but he bought a bunch. And I have plenty of space to hang my ribbons. I have different sizes, all different textures, all different colors.....

And, plenty of patterns to choose from.
The best part is that this freed up a bunch of storage space for new craft supplies!

Monday, May 7, 2012

Tangled hairbow holder

My niece turned one this past weekend and surprisingly I did NOT make her entire gift :)

When my daughter celebrated her Minnie Mouse birthday this January people took the theme and 'ran with it'. And, we now own nearly EVERY 'Minnie's Bowtique' toy on the market. Most of her presents matched the party for some reason. I decided I wouldn't do that for my niece since I figured everyone would probably be choosing 'Tangled' toys to match her theme.

Thankfully (in my opinion) she got a wide variety of items. I went against my gut and decided that the one piece of her gift that I was going to make would have a Tangled theme to it.

I simply bought a mini unfinished birdhouse at Michael's for $1; the one I chose had a tin roof to it. I also bought three wooden spools for .79 each and a round wooden plaque for .59.

A little glue, some paint, yards of yarn and some handmade bows (also by me) and she has a pretty cute hairbow holder if I do say so myself :) My sister-in-law has been asking for bows for my niece more lately so I thought this would be the perfect way to gift a bunch of them to the little cutie.


Tuesday, February 14, 2012

Valentine Hair Bows

I decided to blog about this one while watching my nieces and my daughter all lay together and watch TV today. They are all sporting hair accessories made by moi.

I love making hair bows. I wish I could figure out how to sell them...in the meantime though my daughter and every other little girl I know has a HUGE stash of hair apparel to choose from for any occasion.

They all looked so cute this morning and it made me smile knowing they looked so cute because of something I made :) (please excuse the fact that two of the bows are in uside down-evidently my sister doesn't care about things like that!)

Monday, October 24, 2011

Halloween Headband

I joined Pinterest about 4 weeks ago. One of my friends had invited me-I didn't even ask. I had heard about this place all over the internet and it seemed EVERYONE and their brother was begging for someone to invite them. This must be something good.

I must admit I don't get it. I am not addicted. I don't even go on everyday. Is there something I'm missing?

Yeah, I have several boards and add to them every once in a while but I think I would have survived without it. So far.

It has given me lots of inspiration and ideas for projects so it isn't a bad thing at all. In fact I saw things like this headband all over pinterest for Halloween and I thought: "I could do that!"

I googled some directions for the rose thingy's and got to work.

I bought two of those fabric quarters for $1.99 at Jo-Ann's and used maybe a 1/4 of each one. I found the glitter netting stuff with the rest of the halloween decorations and craft stuff. It was 2.99 but I went three weeks before the holiday so of course everything was already 50% off. I made the rosettes, attached some bling I had on hand and glued the whole thing to felt in the order I wanted and cut it out of the felt. I added the netting to the felt first and then put the flowers down on that. I sandwiched my headband between the felt that held the flowers and another plain piece of felt and I was happy with it.

I am not happy with how my pictures turned out so please forgive me.

I am looking forward to wearing a lot this weekend....we have several trick or treating and other Halloween events to go to and then there's the big candy night! I think I could re-do this for any event or holiday by changing the colors and embellishments.

Happy Halloween to you!

Wednesday, April 20, 2011

Lace Flower Headband

I love finding things out in stores and then saying "I can make that". I also love all the fun headbands that are 'In' right now. I have actually broke down and bought several of my favorite ones from the stores without trying to make them myself. This one I made is SOOOOO simple. I actually found spools of wide lace in those bargain bins at Joann's months ago. For $2.50 each I bought a white one and a antique-y dirty white looking one I think I have made four of these so far and I still have a bunch of lace left.

 I started by cutting two circles of  felt (I used black) to my desired size (they should be the same size) and then used my glue gun to attach the lace. I started on the outer edge and worked my way in. Once the circle was filled in with lace I cut the lace off the spool and folded the end in on itself and glued it down in the middle of the flower. I added a pearl in the center of mine but I did three pearls in the center of another one and I loved the way that looked too. Then I attached it to the headband. Mine is one of those thin stretchy ones that go all the way around your head. I glued the flower to the headband and then glued the other circle of felt to the backside of the flower. I sandwiched the headband between the two cirlces, to make it make more sense. I love how I can wear this with jeans everday or when I get all dressed up.