Seriously, at times doing this trip with a 2 1/2 year old and and 8 month old was crazy and hectic but it was so worth it. My daughter made me cry over and over with her expressions of sheer joy and excitement. And, I will never forget how my son would gaze up at each Princess he saw and almost drool on cue and get that silly boyish grin :)
This post is going to be LONG. I thought about splitting it up but once I started to type I figured,why stop? We returned from our trip on Labor day weekend and the day after Labor day we decided to sell our house. Or at least try. This decision has been months in the making and we are finally taking the leap to see what happens. So, please bear with me during this new adventure!
Anyways, back to planning your perfect Disney World vacation. I am going to give all the advice I can for the way I did it. And, if you have questions please feel free to ask!
Part I-Planning
I started by doing a few things:
I signed up to get emails from Disney for specials, tips and other helpful advice. You can do that by going to the Disney Vacation website.
I also "liked" the Disney World Facebook page. I got lots of info and help from this. This is actually how I found out when they were offering their 'free dining plan' and it just so happened that they were offering it during the time I wanted to travel. That was the push I needed to book my trip. You get a lot of 'fluff' updates from this too especially with the holidays coming and the new Fantasyland opening getting closer but it is also a great tool for planning.
I also downloaded the DisneyWorld App for my Droid phone. I loved having this once we got there! It told us where characters were and wait times for rides and times for parades and shows. Get it before you get there since (at least for me) it took some time to figure out where everything was and how to use it best.
I mentioned above that we had the dining plan. This is the biggest reccommendation I could make. We LOVED the meal plan. So easy and worth it. Well, we got it for free and if you are flexible on when you travel they offer this at least two times a year (that I've seen, maybe more or less). We got one quick service meal, one fine dining meal and a snack each day we were there. We also got a refillable mug (read:souvenir!) that we could refill endlessly at our resort. We were able to go to three character meals and one amazing seafood buffet on this plan and the quick service meals were totally impressive too. Just get the meal plan already!
When it comes to your meals begin EARLY. I started researching how we wanted to eat and what characters we wanted to see. I figured that out and started making reservations. You can make your dining reservations up to SIX months before your trip. DO THIS. So many people tried to get in without them and they always got turned away or told to come back after 9:00pm. Who eats then? Even six months beforehand I could only get one of our reservations for 8:05 pm. All week. The entire stay I couldn't get dinner any early and the only breakfast they had was the first seating at like 7:00am or something. Chef Mickey's is quite popular evidently. Book everything as soon as you can!
When you book your trip they will ask you if you are celebrating anything or if this is a first time visit for anyone in your group. Tell them if there is!! My husband and kids each got a button with Mickey and they gang on it and it said '1st visit!' on it and my parents got buttons for their anniversary. Sure enough everywhere we went all the cast members wished them "Happy Anniversary" and at three of our Character dinners they were presented with the most amazing desserts-free of charge!

That Mickey is like an Oscar...solid chocolate!!
I saw buttons for birthdays, anniversaries, retirements, family reunions, honeymoons, weddings, engagements...almost anything!Part I.2
Bring Mickey with you!
I started shopping for my trip as soon as it was booked. I bought any kind of Disney related product I could. I may be weird but my daughter loved that everything about our trip was 'themed'. From her snacks:

To these wipes and band-aids I found at Walmart:
(I was the only one who ended up needing a Band-Aid all week but my daughter loved looking at which one I put on each day!)
I brought most of our "souvenirs" with me. I searched the Dollar Tree and the $1 bins at Target and Michaels for any and all things Disney. Oh, and Big Lots. I got a few of my higher priced items there. I did this with the intent that we could avoid buying every single thing we saw. In my opinion it worked. Each child got one large and one small stuffed toy. My daughter got one small toy at Disney for extra good behavior one night as well as a bunch of potty prizes. My mom ended up buying these for her because she said it was deserving of Disney prizes so I saved some money there too! But, overall my daughter was satisfied with her 'Mickey prizes' she got each morning. This is also the spot where the puppets and things I made for my son came in to play. I also found him a Mickey ball and a Toy Story bath book as prizes. My daughter ranged from books, bubbles, a princess wand, a princess flashlight and her favorite a toy Mickey camera that I got for $4 at Big Lots.

I made each of my kids this travel pillow:

(from family.go.com)
They give you all of instructions and a pattern for it here. I made the pattern smaller because my kids are smaller.
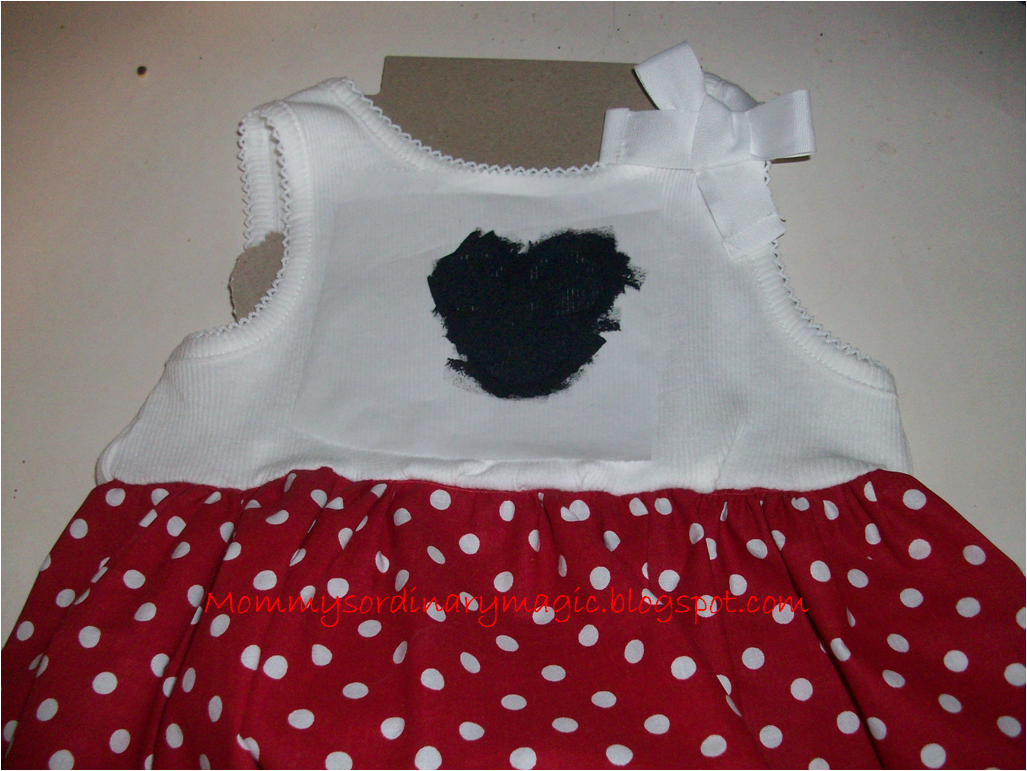
I also started shopping for clothes right away too. Most of their Disney clothes came from Mom2Mom sales at a steal. Then I filled in with store bought things as the summer stuff was going on clearance. I had two outfits for each child each day we were there. My daughter even had enough Pj's for the whole trip! And, I didn't spend much money either.
Part II- Getting thereWe decided to road trip it. I can't imagine the stress of trying to get my two kids AND all the equipment they need on a plane. Then, I would have felt terrible for all the people on board with us once the first tantrum hit-I just know they would have! But, driving just works for us. This was my third time to Disney and my third time driving there. We drive from Detroit to Florida with stops along the way so we arrive sometime on day 3 of our trip. This time we all decided to pack up the car Thursday night and get three hours under our belt. Best decision ever. We ended up somewhere in Ohio at a Hampton Inn. We rested, got free breakfast in the morning and were on our way.
It was also a plus that we had four adults on this trip-me, my husband and my mom and dad. We all took turns switching seats and driving. Well, I didn't drive. I tried but everyone was too nervous about me driving and that made me nervous so I stuck with taking care of the kids. We packed the car with snacks, a bottle of water for each person and lots of Disney movies for the DVD player :) I also took some of my Disney items from my "Bring Mickey With You" idea above and filled a backpack (we already owned) for my daughter. She had plenty to keep her busy if she got bored with movies and goofing around with her grandparents.

I also went to Buy Buy Baby and with one of their coupons I got this amazing item for our trip. It worked really well and folded easily to slide along her seat when not in use.

I also reccommed this tip I found on Pinterest. I bought a cereal container at Wal-Mart for $6 and put a grocery sack inside of it for our garbage can. This was a GREAT idea. We didn't have to worry about it getting smushed or falling over and dumping out. And, when it needed to be emptied we took the bag out, tied it off and threw it out at our next stop. I shoved a bunch of extra bags in the bottom of the container too so we wouldn't have to scramble for more. And, it went behind our console between the driver and passenger seats so it was out of the way. I reccommend putting some velcro on the bottom though. Ours fell over quite a bit but thankfully it couldn't spill :)

If you drive make sure you stop at rest stops and welcome centers if you can. This is where we picked up travel books full of coupons for our hotels. We got most of our hotels at a rate of less than $90 the whole way down and the whole way back! And, if you stop at the official Florida welcome center, it's HUGE!! They have a room for each area of Florida broken down for you to your specific trip and they give out free samples of orange juice! Plus we got to take some great pictures in front of their welcome sign :)

Before we left we used some of our credit card points for stuff. We were able to get a credit on our credit card so we basically had more than $500 in credit on our card to use for gas, meals on the way down, hotel etc. My parents turend theirs in to gift cards. They got gift cards for gas, McDonalds, Cracker Barrel etc. to use on the way down and the way home. Free money that we earned!
Part III: At your Disney Resort
We stayed on Disney property in the Cabins at Fort Wilderness Resort. They look like log cabin trailers but they are GREAT. We had enough beds for all of us: you get one full size bed in the bedroom with a set of bunkbeds and a Murphy bed in the living room. My daughter loved this aspect of the cabin :) Plus, we had a full kitchen for those meals we didn't eat in the park. Great value too!
If you stay on Disney property your room key is EVERYTHING. I like this. It got us in to our room as well as it was our park ticket and our dining pass. My husband and I even linked ours back to our credit card so we could just show that and charge back to our room. Very convenient.
If you stay on Disney properties you can take advantage of their transportation system. This can be a blessing but during this trip it was HORRENDOUS. They tell you to plan for 45 mins to an hour to get around via their sytem. Try 90 minutes to two hours. It was horrible trying to get places on time. But, after our worst incident and voicing our concern a few times things improved a bit.
Our resort had two pool areas and I wish we would have tried to use them more! We only went once and it was GREAT! They have a big pool with music and activities on the pool deck and a kiddie pool and splash zone too. The splash zone was zero depth entry which we love with our son as well as a play structure with water slides, sprayers, dump buckets and waterfalls. But, it was very small and not complex-which our daughter LOVED. The big pool had a big tube slide in it but none of us used that so I couldn't tell you about it. Great way to cool off and relax!
Part III: in the Parks
I don't really have advice for planning your day and choosing which rides to go on or how to get around so this is a bit different.
Use FastPass. We didn't but for the rides we wanted to ride that used it we didn't mind waiting. Except for the Peter Pan ride in Magic Kingdom. OMG, did that take forever. And, that was the only ride that it felt like they let on 2 people for every 50 FastPass users. Geesh. The Toy Story ride in Hollywood Studios is also a popular FastPass ride. We got there at 9:45 in the morning and they were giving out FastPasses for 3:40pm-4:40pm. The times when my kids would be cranky, hungry or sleeping. So, we waited. They said it would be 50 minutes and I guess we got lucky because it was only 20. This ride it worth it. We LOVED it, one of our favorites! We did FastPass the Winnie the Pooh ride and Dumbo and were so happy we did. So easy and very little wait. Plus, Winnie the Pooh was surprisingly another favorite of ours.
If you have small children and older children you should also look into Rider Swap. We took both our kids on everything and if we didn't it was because one or two of the adults didn't want to go anyways. We didn't use it but it's a great tool to know about!
Bring a stroller. Or two. Or rent them. I can't comment on the ones you rent because I brought mine but I noticed that there were strollers there that were rented from stroller rental companies. I have no idea how you find them but they are out there in Florida so you have other options rather than Disney. We went back and forth over which stroller or strollers to take. We didn't want our everyday Chicco double stroller because that takes up WAY TOO much room in the car. We had a double umbrella stroller that we bought second hand that we were going to take but as the trip got closer we got worried about the space it would take up too since it didn't fold well or easily. We ended up going to BabiesRUs and getting a second umbrella stroller just like the one we had. We now own two of these:

We were so glad to have done this! They folded flat so they were easy to pack in the car and then get on and off the busses and boats in Disney. Plus, we were able to fold them and keep them in the cabin with us too and not worry about them. My son preferred to be worn (I took my Ergo too) when he wanted to sleep so we had the second stroller for 'stuff'. We took a diaper bag backpack and two other backpacks(one for us and my parents decided they wanted their own) into the park each day. They held all of our snacks and water and other must have items. The umbrella strollers each had a very small mesh bag on the back of them but it didn't hold much so we had to have the backpacks.
Buy ponchos before you go! I picked up a few ponchos from a local outdoors/fishing/hunting type store for $2 each. And, since we were there right after Hurricane Isaac, we had a little bit of rain. But, just for the first two days and only for bried periods of time! The ones we had were nice because they had hoods with pull strings to tighten around our faces and they had snaps at the arms so you actually had arm holes that closed up and your poncho couldn't fly up around you if the wind hit it just right. So nice. Plus they were way cheaper than anything we saw there!
Buy poncho's for your stroller. I did this but then found actual stroller rain covers in a clearance bin at BBB for $5.99 and went with those. We covered our strollers anytime we left them anywhere and the kids were able to get back in them and be dry themselves because the stroller covers were designed to allow the child to still sit in the stroller while it was on which the poncho wouldn't have done. But, you can cover it with a poncho if you prefer a cheaper, quick fix. We kept both our poncho's and the stroller poncho's in the backpack or the back of the stroller bag. And, when it rained really hard we were able to get Disney Parks bags, like you would get if you bought something, to store the wet ones in if were were going to a meal or show or something. That was nice to have.
There are baby care centers in Disney. These are so NICE! I only ever used them to feed my son but they are a wealth of resources. They had places to change your little ones, feed them (in really nice rockers!) and even areas for bigger kids to play if that is what they needed. I do believe you can get small amounts of formula and baby food there too since they are hosted by Gerber but again I didn't use them all that much. The only downside is there is only ONE in each park so if you are across the way you are out of luck.
Bring a autograph book. I know my daughter won't treasuer it forever but I knew she would want it when she saw everyone else with theirs. I was right. After the first time using it she knew she had to have it out and ready whenever she saw a character. And,you bet she wouldn't get in line without it! I found a small Minnie Mouse notebook in the dollar section of Michael's that I bought. I simply attached a ribbon to the spiral part of it and then tied a sharpie marker to the other end and we were ready to go! I saw people buying two or more of the Disney ones while there because they only come with about 10 pages! Ours has plenty of space left and she can draw on the rest of the pages for all I care!
Another tip I have that I don't know where to put I am just going to put here. We only went into the parks at night one time but we brought our own light up necklaces and bracelets. They sell them at the dollar store and we bought a bunch of them. My daughter never asked to buy anything that night because we already had her decked out in the stuff I had!
Part IV: Eating
If you really want to meet a lot of the characters you should book character meals. We had one four out of five days of our trip. We LOVED it. They were all buffets and the food was so good! The gratuity isn't included in our dining package so just know you will have to take care of that if you go the package route.
Here is what we did:
Chef Mickey's (in the Contemporary resort). We did their dinner buffet but I know they do breakfast too. This had Mickey, Minnie, Goofy, Donald and Pluto. Standard 'American' food and it was so good. No One but Minnie were in their 'traditional' clothes though so if you want pictures of Mickey in his normal outfit and not as a chef make sure you find him somewhere else while on your trip.

Akershus royal banquet hall (Norway pavillion in Epcot) This was our princess breakfast and was AWESOME! The first thing they did is take a professional picture of my daughter with Belle and gave us a few copies free of charge-sure they were worked into the price of the meal! The princesses were so wonderful and my daughter loved talking to them. The buffet part was traditional 'Norwegian' food so they had lots of smoked fish and fruit and different pastries but they brought eggs, potatoes, bacon and the most amazing sausages on overflowing platters to our table.

Disney Junior Play n' Dine at Hollywood and Vine (Hollywood Studios) I think this was my daughters favorite since it was the characters from her favorite Disney Junior shows. We saw Jake, Oso, Handy Manny and June from little Einsteins. Again, an american themed buffet with sandwiches, salads, chicken, pizza, etc The kids actually have the chance to get up and sing and dance all through lunch with the characters. My daughter really enjoyed this. This was by far the noisiest meal of our trip!

Crystal Palace Breakfast Buffet (Magic Kingdom) Such a good breakfast spread!!! This had Winnie the Pooh, Piglet, Tigger and Eeyore and was my favorite ;)

We booked our reservations for BEFORE the park opened which meant we got in before it got crowded and took awesome pictures on Mainstreet USA without as many people around.

Our last night there we opted out of charachter dining to commemorate my parents anniversary (2days later). We had the best seafood buffet at Cape May Cafe at the Disney Beach Club Resort. So worth it!
We were surprised by our quick service meals. They included whichever combo meal of your choice, a large drink and a dessert. That's a LOT of food. My parents started sharing theirs after a few days! For our quick service I preferred to still be able to sit down inside (read:in air conditioning) to eat. Each park has someplace like this and I made it my mission to find it!
I'll share my secrets with you:
Magic Kingdom: Columbia Harbor House in Liberty Square (awesome Lobster roll!) or Pecos Bill's Tall Tale Inn in Frontierland (great burgers!
Epcot: Liberty Inn in the American Adventure Pavillion (my husband actually got a 6oz strip steak with potatoes and brocolli! plus they had really great apple crisp for dessert!)
Hollywood Studios: ABC Commissary (largest seating area indoors of all the quick service places)
Animal Kingdom: Restaurantsaurius in Dinoland USA
Part V: Shopping
This will be my shortest section.
If you are staying on site at a Disney resort anything you buy in the parks can be taken back to your resort for you so you don't have to carry it around all day. Our resort had a central location for this so it didn't come right to our cabin but it's still nice.
My favorite souvenir was one we bought as a gift to share for our kids. We got it in Downtown Disney at Once Upon a Toy. My mom bought one for my sister as a request for her preschool class room and I went back and made my own. You can make your own Mr. Potato Head. There are so many Disney themed pieces to choose from and as long as the box they give you closes it costs $19.99 plus tax. One of the cast members working there told us that each piece is $2.45 on its own so if we wanted to fill the box with all the facial features and buy the head separately it would give us lots more room in the box for only $2 extra! So, for $23 and some change we got all of this:

My kids LOVE it!
Overall it was a GREAT trip. And, again I can't wait to go back :) If you're still here with me, thanks and I hope I helped. Here are some other great blogs that I used during my planning: